You can create and manage them under:
Left Menu → MANAGE → Events
Create an Event
Click + Add Event to set up your session. You’ll configure:1. Name
Give your event a clear, recognizable title.Examples: “Yoga Flow”, “Beginner Photography Workshop”, “Intro to Tennis”
2. Icon or Image
Add a visual to help clients quickly recognize your event.3. Description
Explain what the event is about (up to 500 characters).Examples: “Beginner-friendly. Bring your own mat.”
4. Pricing
Choose between:- Single-price events (e.g., 20 spots at $15)
- Tiered ticketing (e.g., VIP 15)
Set price to $0 for free events.
5. Resources
Assign who or what runs the event:- Instructor or staff member
- Room or studio space
- Equipment (optional)
Read more: Organizer Field
6. Location
Add a physical address or a digital link (Zoom, Google Meet, etc.).7. Dates
Add a single date or up to 100 recurring dates for classes and repeating sessions.8. Advanced Settings
- Enable or disable instant booking
- Add organizer labels
- Customize visibility and order
9. Payments
Toggle Stripe payments on/off or keep the event free.10. Visibility on Booking Page
Review visibility under:Top Left Menu → Customize Booking Page → Events
Waitlist Management
Never lose potential clients when events sell out.Enable waitlists to let clients queue instead of hitting a dead end.
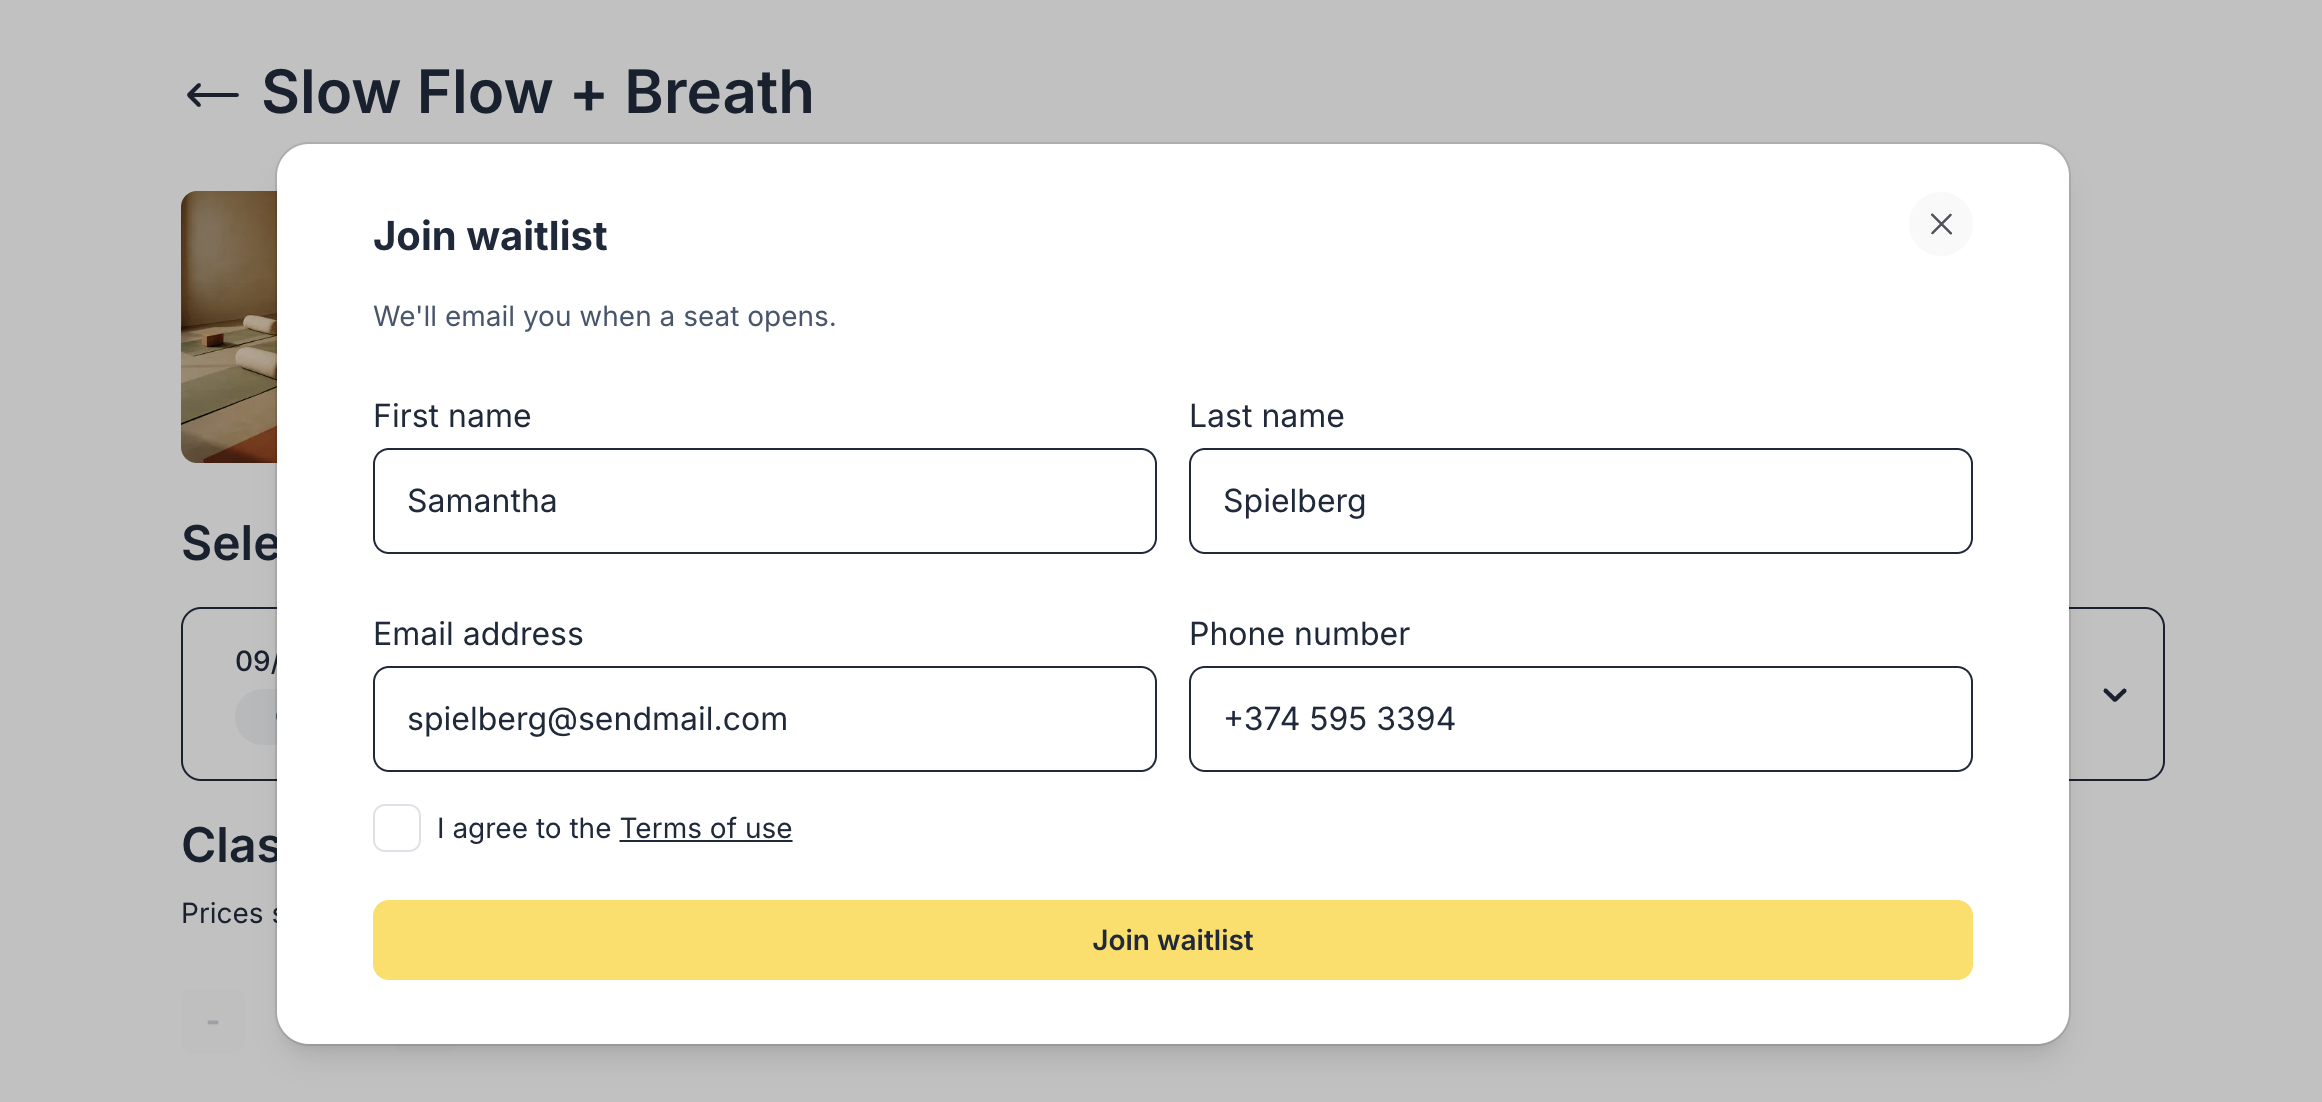
How to Enable the Waitlist
Go to:Left Menu → MANAGE → Events → [Your Event] → Payment & Checkout
Toggle Enable Waitlist.
Options You Can Configure
- Waitlist capacity
Set the number of people who can queue (use 0 for unlimited). - Auto-offer from waitlist
When a spot opens:- Oskar automatically sends a claim link
- First in line receives first offer (FIFO)
- Each client gets 12 hours of exclusive access to book before the spot goes public again
- Issue claim links
- Resend them
- Expire them
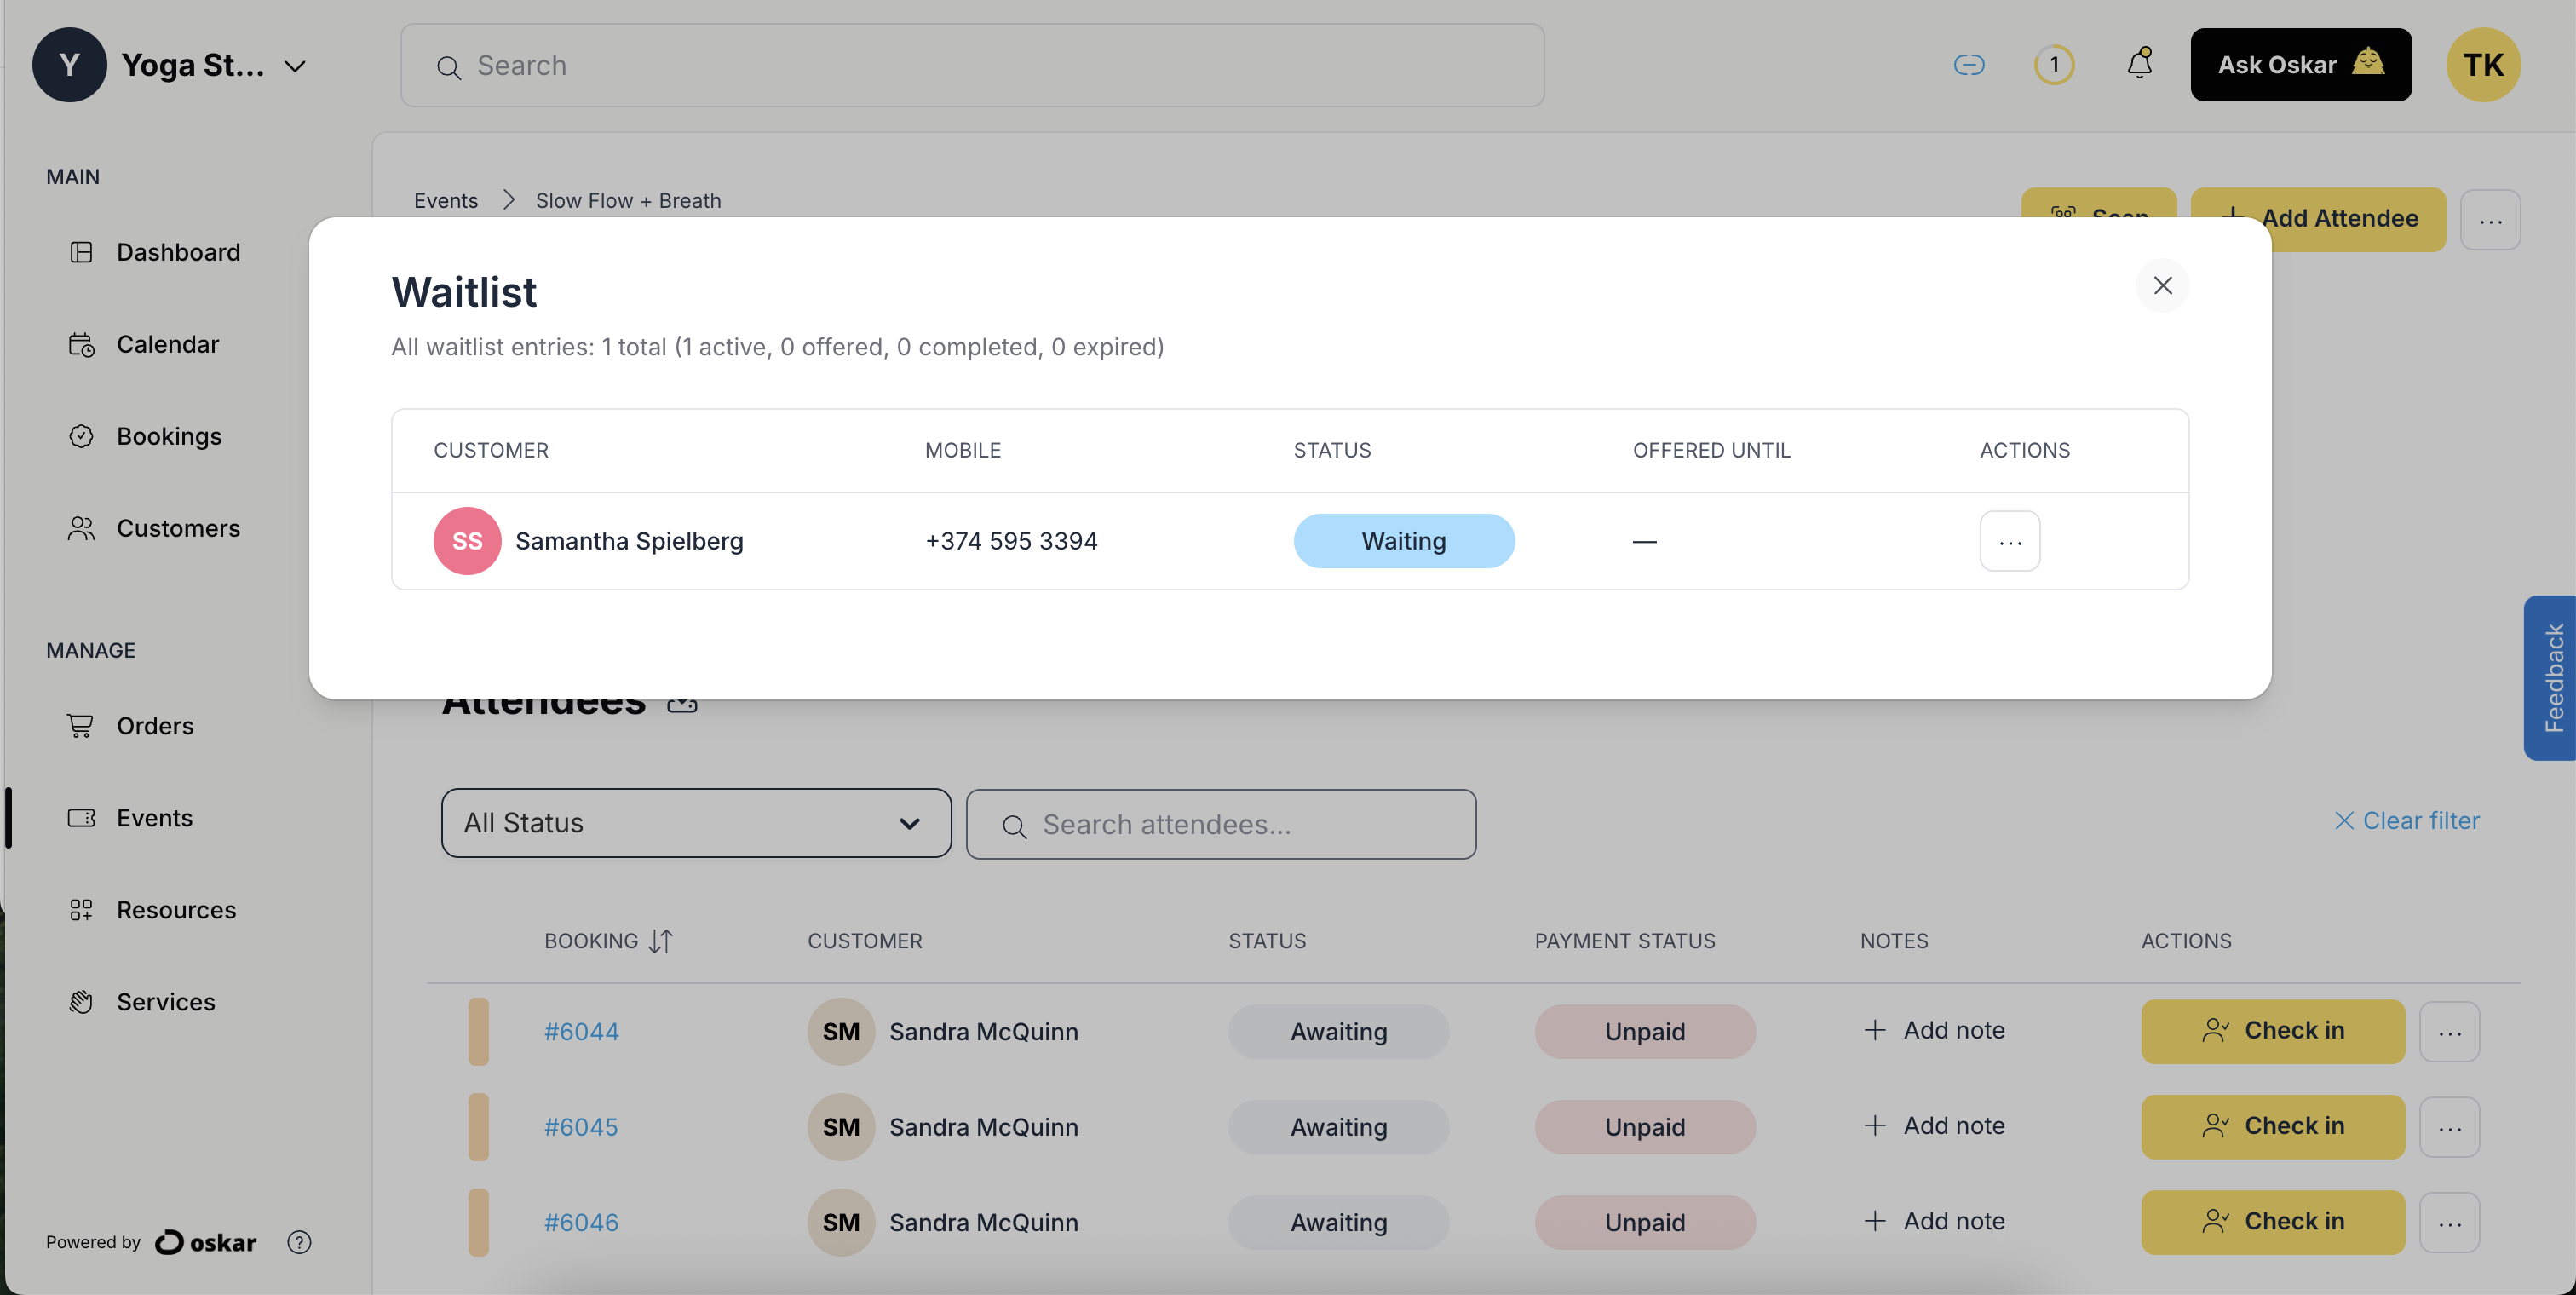
Admin View: Managing the Waitlist
Open your event or any specific occurrence.At the top, in the Booked Slots panel, click Waitlist to view or manage all queued clients.
Checkpoint
✔ Waitlist enabled?Then clients always have a path forward — even when your event is full.
Improved Event Management
Enhanced tools for large series and history.Series-Level Pagination
Navigate long recurring series (e.g., 100+ dates) with clear page counts and navigation jumps.Quick Start
Cumulative Past Events Pagination
Review historical classes or sessions efficiently with date-range based pagination — prevents slow loading when you have years of history.Enhanced Deletion
- Safe logic: Prevents deleting events with future bookings or approved payments.
- Granular options: Delete single occurrence, all future events, or entire series.
- Confirm prompts ensure no accidental data loss.
Timezone-Accurate Date Picker
Ideal for global teams. Automatically detects and applies the timezone of the assigned resource or organizer.Tips for Large Series
- Use bulk edit at the series root to update all future dates.
- Archive past dates using filters to keep your dashboard clean.
- For multi-week or repeating programs, see
Recurring Bookings.